TOOLING: Designing Molds for Easy Cleaning & Maintenance in the Press
Pay attention to water leaks and rust, proper grease selection, vent buildup, and checks for wear.
In this column, I will discuss best practices for cleaning and maintaining the mold in the press to reduce downtime from part scrap and tooling issues. Last month I covered design of water lines and moving components to reduce maintenance issues. Water also deserves considerable attention in terms of maintenance procedures.
Water from leaks or condensation can cause a lot of damage to a mold and cavities. I myself have dealt with hundreds of rust problems from water leaks and condensation. Some were very severe and cost thousands of dollars to repair and a lot of personal stress in dealing with downtime and trying to make quality parts. If the issue is caught soon enough, a light surface rust is not a major issue. But if the water or condensation is allowed to sit long enough it can cause major damage.
RUST PROTECTION & O-RINGS
In one situation I experienced, the tool was properly cleaned, sprayed with rust preventative, and pulled from the press; but the water leak was not noticed, allowing the water to accumulate inside the clearance holes. With the tool sitting in storage, the water leaked into the diamond-polished cavity and caused major damage. Some will ask: How could this occur with the tool properly pulled, cleaned, and sprayed with a rust preventative? Well, not all rust preventatives are the same. I have used numerous brands over the years and am surprised that some even are used in the industry.
There are numerous reasons why people choose a specific brand or formula: cost, what they have always used, not fully understanding the pros/cons, or just pure opinion. I bring this up only for you to consider whether the rust preventative you are using is contributing to any of your issues.
The viscosity varies with the brand of rust preventive. Some prefer to use a more liquid style that is more visible. I have found that these types can sometimes cause startup issues with scrap and labor to clean the cavities before starting the mold for production. The more liquid versions can sometimes also break down the greases used on the tool and contribute to bleeding, scrap, and downtime for cleaning.
For years I have used a dryer version, which does not break down grease, provides a more protective rust barrier, does not require cleaning the cavities at startup, and reduces startup scrap with the rust barrier being removed after a couple of shots. When there is a need to transport molds through different climates, I use a more robust protectant. (Cavities can also have coatings applied to protect against rust if the issue is chronic.)
One other aspect of rust prevention is using a good shutdown procedure. When running a mold with a chiller, you are at risk for rust from condensation if not shut down properly. When the mold is done running or going to sit idle, it should be brought up to room temperature and have a protectant applied immediately.
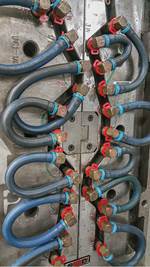
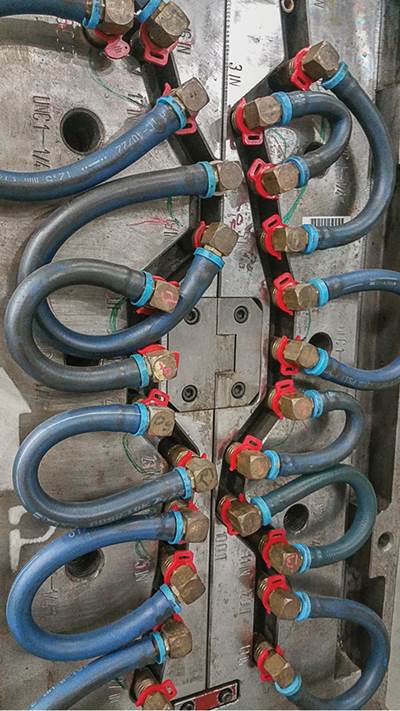
Maintaining the water connections and O-rings should also be considered. Water connections should be observed for leaks during preventive maintenance (PM), and if any leaks are observed in production, the issue should be addressed as soon as possible. O-rings in the water connections will fail over time and most molders do not have a procedure to replace them pre-emptively, so the first evidence of a bad O-ring is a leak.
When running molds with higher water temperatures (above 180 F), the water lines should be hard-plumbed using fittings with a tapered sealing surface, versus the standard water coupler connection using O-rings. This will reduce the chance of a worker injury from a high-temperature water leak.
I would recommend that O-rings inside the tool be replaced at each PM. And if any observations indicate an internal water leak in the tool, that should be addressed as soon as possible. One thing a toolmaker does not like are components or cavity inserts corroded with rust, as these can be very difficult to remove.
CHOOSE THE RIGHT GREASE
In my job I have had to address cases of running hours of scrap after preventive maintenance—that is, when the mold is completely disassembled, cleaned, and greased with new lubricants. I have found that some greases are more prone to bleeding if not applied properly, and others do not hold up well in high temperatures with high mechanical friction. I have tried out numerous greases on the market, and not one covers all situations and applications. But it is critical to find the right grease for your application.
It is also important to make sure your components are designed properly and use proper coatings and hardnesses to reduce failures. It is not always the lubricant at the root cause of mechanical failures. In some cases, greaseless tools are necessary and can achieve good maintenance results if properly designed and coated. For high-volume tools, I typically specify 100,000 cycles between PMs for most materials; but with higher-temperature and glass-filled materials, I set the spec at 50,000 cycles. And there are always cases where those cycle counts are too high.
MAINTAINING MOLDS IN THE PRESS
You should also have a setup procedure to maintaining the parting-line shutoffs, vents, cavities, and wear surfaces while the mold is in the press. This will vary from tool to tool and the material being molded. For example, with gassy materials, vents and parting lines will need to be cleaned more often. If vents continually need to be cleaned, I would evaluate the venting itself.
Buildup on the cavity surface can cause gloss and sticking issues. This can be difficult to clean in the press with standard cleaners. I have developed a cleaner to address this issue, called Zap-Ox.
One issue that can frustrate toolmakers is damage from plastic flakes building up on the parting-line shutoffs. This is typically a result of bad gating, undercuts on sprue-puller pins, or stringers from the sprue or hot drop. The flaking or stringing issues should be resolved to prevent mold damage.
Different mold temperatures for the two mold halves can also contribute to wear, flash, galling, and contamination of the parts. Whenever mold temperatures differ between the two halves, the tool should be evaluated to see if this could cause any issues. The hotter half will thermally expand so it will be dimensionally larger. This can affect wear and galling on pins/bushings, lock angles/corner locks, and shutoffs, causing flash or galling, depending on which way the mold half is expanding. I have had cases where wear on the corner locks created contamination on the part from debris falling into the cavity.
Concerning pins and bushings, I prefer to use solid bronze bushings, especially on larger tools, to prevent gulling between the pin and bushing. Solid bronze will hold up better than bronze-plated bushings. Since implementing this standard in my shop years ago, galling of pins and bushings is no longer an issue.
One other area that is prone to wear if not maintained is slide-lock angles. This surface sees a lot of mechanical friction on mold closing. Many people focus on the horn/guide pin for the slide as what needs to be greased. It does need grease, but the lock angle is the surface that really deserves the attention. Once the lock-angle surface wears, it can contribute to flash from loss of preload.
When cleaning the parting lines or cavity surface, mold cleaner should never be sprayed directly on the components or cavity surface that has lifters or ejector pins. This can create bigger issues of bleeding onto the plastic part and loss of lubricant on the mold component. To remove excessive grease from a component, it should be cleaned with a rag sprayed with mold cleaner. Many moldmakers apply more grease than necessary, and their grease of choice can contribute to the issue by not being optimal for the mold’s application.
Maintenance of the mold exterior varies among molders. This doesn’t take much effort and will also protect your platens. The outside of the tool, specifically the clamping surfaces, should be cleaned after pulling, and a rust preventative should be applied. This should also be performed on the platen surfaces. The other exterior surfaces of the mold should be examined for water leaks or rust and cleaned up or sent to the toolroom to investigate the water leak. The mold-mounting surfaces should also be observed for burrs or dings at PM and when setting or pulling the tool.
ABOUT THE AUTHOR
Related Content
How to Get Rid of Bubbles in Injection Molding
First find out if they are the result of trapped gas or a vacuum void. Then follow these steps to get rid of them.
Read MoreThe Importance of Melt & Mold Temperature
Molders should realize how significantly process conditions can influence the final properties of the part.
Read MoreTunnel Gates for Mold Designers, Part 1
Of all the gate types, tunnel gates are the most misunderstood. Here’s what you need to know to choose the best design for your application.
Read MoreHow to Select the Right Tool Steel for Mold Cavities
With cavity steel or alloy selection there are many variables that can dictate the best option.
Read MoreRead Next
TOOLING: Designing Molds for Easy Maintenance in the Press, Part 1
Attention to design of cooling, ejection, and slides can save downtime and maintenance headaches.
Read MoreWhy (and What) You Need to Dry
Other than polyolefins, almost every other polymer exhibits some level of polarity and therefore can absorb a certain amount of moisture from the atmosphere. Here’s a look at some of these materials, and what needs to be done to dry them.
Read MoreAdvanced Recycling: Beyond Pyrolysis
Consumer-product brand owners increasingly see advanced chemical recycling as a necessary complement to mechanical recycling if they are to meet ambitious goals for a circular economy in the next decade. Dozens of technology providers are developing new technologies to overcome the limitations of existing pyrolysis methods and to commercialize various alternative approaches to chemical recycling of plastics.
Read More
