How to Pick, Remove, and Replace a Nozzle Tip
This small component can cause big problems. Here’s my procedure for picking and replacing yours.
It’s simple, right? Just unscrew the nozzle tip and screw on the new one. Nope. For those of us who have done this a few times, it does not always go this smoothly. Molding involves hundreds of details ... and I do mean hundreds. This one, the nozzle tip, may seem minor. It may be small, but it can cause significant trouble, downtime, lost production, and significant profit loss. How can such a small part cause so much trouble?
The accompanying illustration shows the three most common types: general-purpose, reverse-taper, and free-flow. These screw into the nozzle body. They come in different lengths, but like the nozzle body, do your best to keep them as short as possible as they often add a significant pressure drop, which makes filling and packing the parts more difficult. The general-purpose tip is the most common at most molding shops. However, I consider this a “no-purpose” tip, to be discarded.
Why? There are a number of reasons:
1. The G-P tip has a long land, which creates a larger pressure drop.
2. It provides a dead space that is difficult to purge clean. Molders can waste 50 to 100 shots changing colors or materials.
3. Research by well-known molding expert Steve Brammer (The Humble Nozzle) show it can produce higher viscosities and temperatures. (Brammer’s blog is available at short.ptonline.com/HumblNozzl.)
Add these up and you are talking thousands of dollars lost per day in each plant. Small part, small price—but it needs attention. My personal preference is the free-flow type, because it resolves each of the above three problems. Whatever your preference, I would avoid mixing nozzles/nozzle bodies—these also have significant issues and are really Band-Aids meant to compensate for poor
screw design.
After you pick among the styles, you have to figure out how to control the temperature. nozzle body or the nozzle tip to change the temperature of the melt coming out of the end cap of the barrel. Instead, you want the tip to maintain that temperature, since a hotter or colder ring of plastic around the flow channel will show up as a haze, blush, or halo in your part. Controlling nozzle-body and tip temperature is easier said than done, as there is no easy way to measure. I have seen as much as 200° F (110° C) variation from setpoint in a nozzle body and tip. In addition, there can be a problem in cold runners, where you want the tip at melt temperature but it conducts heat to the sprue bushing of a cold mold, so plastic freezes in the nozzle-tip orifice. You will have to experiment to find what setpoint provides the correct temperature.
(Read more details on temperature control of the nozzle body, and maintenance of the nozzle body and tip.)
Now, here is the procedure for replacing nozzle tips: Please Note: No one procedure is correct for all applications.
Never mind ISO 9000; you have a brain—use it. This procedure must be modified for your own situation or conditions. You are responsible for your own safety.
1. Find the appropriate tools and safety equipment. These include safety glasses, high-temperature gloves, arm protection, and nickel or molybdenum disulfide antisieze compound. Tools should be an appropriate wrench and a metal rod slightly smaller than the nozzle-tip orifice to clean out the nozzle.
2. Back the barrel/sled as far as possible, though with some machines there might be a better position for ease of access.
3. If electrical or thermocouple wires are in the way, turn the power off and take the time to permanently route along them to the non-operator side of the machine. It is safer and you will not get purged material on them, a common problem that causes hours of downtime to replace, at significant cost. It will save you time and anguish in the long run.
4. Purge the barrel if you are running a temperature-sensitive resin, such as PVC or POM (acetal).
5. Ensure the screw is forward with no spit- ting or drooling from the nozzle. Note: This is not a failsafe step—expect resin spitting and take all proper precautions.
6. Find the appropriately sized box-end wrench or socket. Use the six-point versions as they are safer because less likely to slip off. Ensure a good safe grip on the common 7/8-in. tip.
7. With the barrel up to temperature (heaters can be off if necessary) find the best position for the wrench to provide adequate leverage. On some machines, getting the wrench in place where you can get a decent grip and leverage it is next to impossible. (You wonder some- times if the machinery manufacturer ever has to do this.) A flexible or swivel end to the ratchet can be of help but tends to slip and is not as safe as a direct placement.
8. First, try to break the nozzle tip loose. Beware of the possibility of the wrench slipping and subsequent movement of your arms, hands, or torso banging against your surroundings. Normally you are cramped for space in this operation.
9. If you get it started, it should turn easily all the way out. If it turns but with effort, you have either a nozzle tip with bad threads or there is solidified carbon between the threads of the tip and the nozzle body. It will take significant effort to get the nozzle tip completely off. As for why, read steps 12-16.
10. If the nozzle is to be used again, I suggest cleaning it by using a dowel to push the plastic out from the front of the nozzle tip. (Remember to use appropriate heat-resistant gloves.) It is easier to clean while the plastic is molten. Look for carbon, a previous color, or material as a sign of dead space in the bull nose of the nozzle.
11. If you cannot break it loose, try tapping it with a hammer or add some heat. If you have to use a cheater bar, make sure the wrench is strong enough to take the load—and it had better be a six-point contact type.
12. Inspect the old nozzle’s threads, nose, and seat for dings, burrs, or any non-uniformity; toss if not in good shape. If reusable, clean and store appropriately. Tossing it into a box or drawer is not acceptable.
13. Prepare the replacement nozzle tip by cleaning it and ensuring that it matches the radius of the sprue bushing of the mold and has the right size orifice—that is, slightly smaller if it is a cold runner, nearly the same size if a hot runner. Check that seat is clean and flat with no burrs or dings. Check that the nose is clean and not dinged. Double-check that the threads are symmetrical, clean, and lubed with a high-temperature and extreme-pressure anti-sieze compound. I like molybdenum disulfide.
14. Using protective gloves, start screwing in the replacement nozzle tip. If it does not start or turn easily, do not force it; you might get it on but it probably will not come off. Find out if the threads are stripped on the nozzle or nozzle body.
15. Screw the nozzle tip in until it seats but do not torque it tight. Turn it in until it gently seats then back off, wait 10 sec, and seat it again with low torque. Note whether it goes farther in. You are trying to make sure that the nozzle-tip seat is seating to the seat of the nozzle body with no plastic on either seat. Take time here to allow the nozzle tip to heat up and melt any plastic between the tip and nozzle-body seats.
16. With very low torque—say, less than 15 ft-lb, allow the nozzle tip to come up to temperature—perhaps 5-10 min. Then tighten it. If you tighten it as soon as you put it on, the nozzle tip will heat up, the threads will expand, and you can look forward to the nightmare in step nine.
That should get you back into production. Remember, if the nozzle tip does not screw in or out easily once it is off the seat, there is something wrong. Forcing it will only make matters worse; you will be wasting more time, effort, and money over something that should not have happened to begin with.
ABOUT THE AUTHOR: John Bozzelli is the founder of Injection Molding Solutions (Scientific Molding) in Midland, Mich., a provider of training and consulting services to injection molders, including LIMS, and other special- ties. Contact john@scientificmolding.com; scientificmolding.com.
Related Content
Why (and What) You Need to Dry
Other than polyolefins, almost every other polymer exhibits some level of polarity and therefore can absorb a certain amount of moisture from the atmosphere. Here’s a look at some of these materials, and what needs to be done to dry them.
Read MoreA Simpler Way to Calculate Shot Size vs. Barrel Capacity
Let’s take another look at this seemingly dull but oh-so-crucial topic.
Read MoreHow to Optimize Pack & Hold Times for Hot-Runner & Valve-Gated Molds
Applying a scientific method to what is typically a trial-and-error process. Part 2 of 2.
Read MoreRead Next
Nozzle Leaks: Why They Occur, How to Detect & Fix Them
Nozzle leaks are a serious problem in injection molding. Here are some causes and remedies.
Read MoreHow Polymer Melts in Single-Screw Extruders
Understanding how polymer melts in a single-screw extruder could help you optimize your screw design to eliminate defect-causing solid polymer fragments.
Read MoreUnderstanding Melting in Single-Screw Extruders
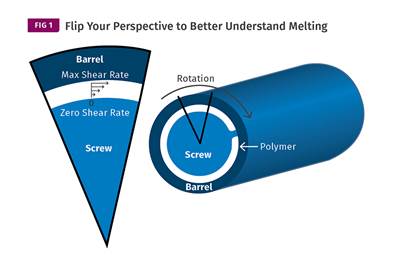
You can better visualize the melting process by “flipping” the observation point so that the barrel appears to be turning clockwise around a stationary screw.
Read More.jpg;width=70;height=70;mode=crop)
