How to Set Up Mold Protect on Your Injection Machine
Set the start position for mold protect where anything in the mold could be subject to damage.


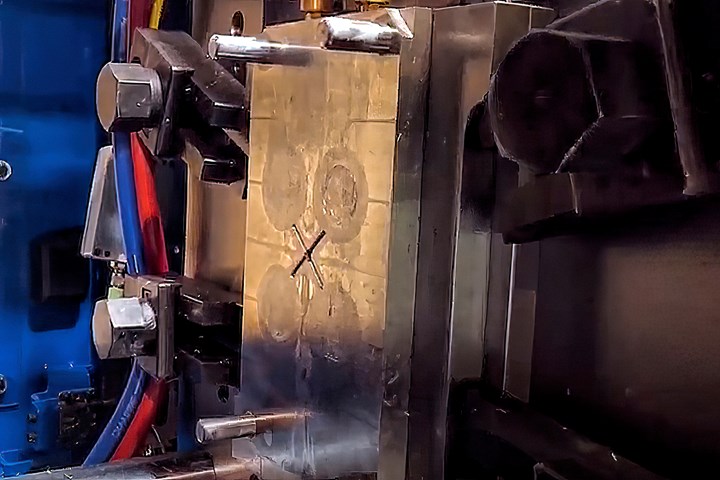
Set the start position for mold protect where anything in the mold could be subject to damage. In the mold shown here, that would be the leader pins. (Photo: RJG Inc.)
Besides the injection molding machine itself, the second most expensive piece of equipment that we use on a daily basis is the mold. When a mold is damaged, you don’t have to bear just the cost of repairs, but also the cost of downtime and labor. That’s why it’s so important to set up mold protect to safeguard against damage. If done correctly, it is possible to get the mold to stop on something as thin as a business card. Here are three key components to setting up mold protect on your injection press.
1. Start Position of Mold Protect
Here’s a simple way to think about start position: When the mold is closing, when do you get to the point where something might break in the mold? In the image above, that point would be when the mold hits the leader pins. This is the point where we would want to start mold protect.


Close the mold until there is a small gap between the mold half and the protruding part of the other half that is at risk of damage. Then look at the mold position on the controller to see where you want the mold protect to begin. For the mold shown above, that position is 1.69 in. So we set the low-pressure mold-protect position for 1.69 in. That is where mold protect will start.
2. End Position of Mold Protect
You want to stop protecting the mold once it is completely closed. This is called clamp-up position or mold-touch position on the machine. Clamp up the mold in manual mold-set mode until there is no gap between the mold halves. Read the position on the machine controller—for the image above, the mold position is 0.03 in. Set the clamp position on the machine slightly higher than the actual position to protect it.
3. Speed and Pressure During Mold Protect
Now that we’ve established starting and ending points for mold protect, we need to se the speed and pressure that we allow the machine to reach during mold protect. Generally, you want to slow down during this transition period and set the pressure low enough that if there’s something in the way of the mold halves, it will stall the clamp movement and give a clamp alarm.
Closing pressure is the most important aspect of mold-protect settings. You want to use as little pressure as possible to get the mold closed.
The pressure aspect is the most important setting for mold protect. You want to use as little pressure as possible to get the mold from the mold-protect start position to clamp-up position. If the pressure is too high, the clamp might not stop on a part that is in the way. You can experiment by slowly lowering your pressure eventually getting to a point where the mold doesn’t get to clamp-up position anymore—but be sure to do this with clean and greased leader pints and grates. Resist the urge to raise the pressure anytime the mold doesn’t clamp, because there might be something in the way, or the leader pins might be dirty. Don’t raise the pressure—clean the pins.
Following these simple steps will help protect your valuable mold asset. Your toolroom will really like you for it. (Watch the author demonstrate these steps at short.ptonline.com/moldprotect.)
ABOUT THE AUTHOR
Jason Robinson, consultant/trainer at RJG Inc., has more than 20 years’ experience in plastic injection molding. He leads courses at RJG’s Southeast Training Facility in Gibsonville, N.C., where he trains injection molding professionals in scientific molding and best practices. Contact: jason.robinson@rjginc.com; rjginc.com.
Related Content

Why (and What) You Need to Dry
Other than polyolefins, almost every other polymer exhibits some level of polarity and therefore can absorb a certain amount of moisture from the atmosphere. Here’s a look at some of these materials, and what needs to be done to dry them.
Read More
How to Set Barrel Zone Temps in Injection Molding
Start by picking a target melt temperature, and double-check data sheets for the resin supplier’s recommendations. Now for the rest...
Read More
Are Your Sprue or Parts Sticking? Here Are Some Solutions
When a sprue or part sticks, the result of trying to unstick it is often more scratches or undercuts, making the problem worse and the fix more costly. Here’s how to set up a proper procedure for this sticky wicket.
Read More
How to Stop Flash
Flashing of a part can occur for several reasons—from variations in the process or material to tooling trouble.
Read MoreRead Next

RJG Consolidates Southeast Training Facilities in North Carolina
RJG is consolidating its Gibsonville, N.C. and Woodstock, Ga. training facilities to Rowan-Cabarrus Community College’s (RCCC) campus in Kannapolis, North Carolina.
Read More
How to Manage Pressure Loss in Injection Molding
Achieving a process window wide enough to ensure consistent part quality depends on achieving sufficient pressure at end of fill.
Read More
The Difference Between Knit and Meld Lines--and Why It Matters
In many part designs, flow fronts will inevitably be split, but how and where they come back together is hugely important to the molded part’s finished strength.
Read More