Unraveling the Mysteries of Melt Temperature
Infrared technology can provide consistent and accurate readings of melt temperature. Here’s how to use it.
What is the melt temperature? The answer to that question certainly would be helpful for processing and troubleshooting. But few molders would argue that it is one of the key parameters for injection molding—probably because they have had to make do without reliable melt-temperature data so far.
While the question about melt temperature appears straightforward, it actually also implies two other questions: What should the temperature be, and is the melt sufficiently uniform in temperature to specify a single number? Unfortunately, there are no simple answers. Even today there is no widely accepted and trusted method for measuring temperature during processing in injection molding. But you might find an infrared camera useful in getting some answers.
That said, how do you get a handle on what temperature to target and how to measure it? First, let’s tackle how to determine the target temperature for your resin. Start by getting information on the specific grade. Do not simply go with, “It’s a nylon” or “polystyrene.” Today there are grades formulated with additives that drastically change the processing temperature; you want to be sure you are operating in the recommended range for your specific material. Too high a melt temperature may destroy the UV or antioxidant stabilizer; go too low and you can shear off the screw tip or have unmelts flowing through your barrel and mold. So take the time to find the supplier’s recommended range and target the middle of that range, unless you have experience with this resin and already know the correct processing range.
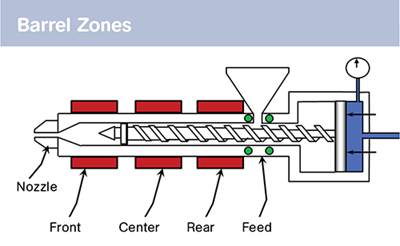
Usually this data is available from the supplier’s literature or one of the online databases for resins such as SpecialChem’s Universal Selector. Look up the resin, find the specification datasheet and look for something along the lines of “processing details.” Once you have a target temperature, refer to my column in February 2014, which details how to set barrel-zone temperatures.
With the barrel zones set correctly, turn on the heater bands and watch to make sure that the barrel warms up uniformly. Ideally have all zones, including the nozzle body and tip, come up to temperature setpoint evenly. Use this method for your hot-runner nozzles, tips, and manifolds as well. Do not let the nozzle body or tips heat up to set temperature in 15 min while the barrel zones or manifold take 45 min. That is one way to start degradation and black specks. After the appropriate heat-soak time, roughly 20 min for smaller machines and up to 1 hr on larger ones, you can operate the screw.
Just don’t start by rotating the screw. My suggestion is to leave the screw 50 mm back, and manually inject to clear the check (non-return) valve. Then rotate the screw to purge and rotate to achieve shot size. As you purge, turn on your IR camera and allow some time for it to self-calibrate (most do this automatically). Make a purge and practice taking a picture (i.e., the temperature) with peak or max turned on. That is, find the angle that allows you to watch safely the purge as it is shot and sharpen the focus. Most IR cameras do not have auto focus, and focus is important for good results. Also, ensure the emissivity is at 0.95.
Start making shots, ensuring you are slightly short, using first stage (fill) only, and you are under velocity-controlled conditions. Then add second stage (pack and hold) to make full parts. You cannot determine melt temperature until the machine has run several shots, as about 80% of the energy to melt the plastic comes from the mechanical shear and pressure within the transition/ compression zone of the screw. You will get an incorrect temperature reading if you do not let the process stabilize. How do you tell the process is stable? When you see that fill time does not change and the pressure at transfer stops trending and varies within a given range.
After the process stabilizes, you are ready to take the melt temperature. Back the injection unit away from the sprue bushing. If necessary, place cardboard in front of the sprue bushing then purge, capturing the IR image as you do so or immediately thereafter. Make sure the picture does not have the nozzle tip or heater band in view, and read the peak temperature of the purge.
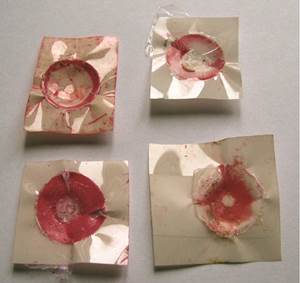
It is important to capture the image of the purge as quickly as possible, as IR does not penetrate and you really only are taking the temperature of the surface or skin of the purged melt. If you purge and then pull out the purge patty to measure temperature, the surface will have cooled slightly. If you are using an IR gun, keep in mind that the red dot is not taking the temperature reading. The red dot is the center of IR beam area, a circle or oval. The diameter of the circle can be several inches, so make sure the area of the IR beam (circle) does not include anything but the purge or polymer. See the accompanying photo for a representative IR picture of a small purge.
As for melt uniformity, rarely can this be achieved via a standard general-purpose screw design. One of the main reasons many molders use higher temperatures than necessary is that the melt quality is poor, consisting of melted polymer and partially unmelted granules. The melt uniformity test is straightforward: Start up running natural then add a few granules of color and check uniformity of the color dispersion in the part.
Bottom line, IR temperature readings are easier to take than using temperature probes and are far more consistent. Accuracy will usually be within ±10° F (±5° C). What really stands out is that if you see differences between one run and another, they are real, as IR temperature readings are repeatable and will be within ±2° F (±1° C).
ABOUT THE AUTHOR: John Bozzelli is the founder of Injection Molding Solutions (Scientific Molding) in Midland, Mich., a provider of training and consulting services to injection molders, including LIMS, and other special- ties. E-mail john@scientificmolding.com or visit scientificmolding.com.
Related Content
The Importance of Melt & Mold Temperature
Molders should realize how significantly process conditions can influence the final properties of the part.
Read MoreAre Your Sprue or Parts Sticking? Here Are Some Solutions
When a sprue or part sticks, the result of trying to unstick it is often more scratches or undercuts, making the problem worse and the fix more costly. Here’s how to set up a proper procedure for this sticky wicket.
Read MoreA Simpler Way to Calculate Shot Size vs. Barrel Capacity
Let’s take another look at this seemingly dull but oh-so-crucial topic.
Read MoreTunnel Gates for Mold Designers, Part 1
Of all the gate types, tunnel gates are the most misunderstood. Here’s what you need to know to choose the best design for your application.
Read MoreRead Next
How to Set Barrel Zone Temps in Injection Molding
Start by picking a target melt temperature, and double-check data sheets for the resin supplier’s recommendations. Now for the rest...
Read MoreWater Droplets in the Feed Throat
And other reasons you must dry hygroscopic resins.
Read MoreAdvanced Recycling: Beyond Pyrolysis
Consumer-product brand owners increasingly see advanced chemical recycling as a necessary complement to mechanical recycling if they are to meet ambitious goals for a circular economy in the next decade. Dozens of technology providers are developing new technologies to overcome the limitations of existing pyrolysis methods and to commercialize various alternative approaches to chemical recycling of plastics.
Read More.jpg;width=70;height=70;mode=crop)

