All About ‘Cushion’
Injection Molding Know How
What it means. Why it's important.
Many believe injection molding is more art than science. I don’t have all the answers but have spent many years working to replace as much of the art as possible by using scientific principles.
Perhaps one of the reasons the term “art” pops up is the confusion in our industry about terminology. To date, there is no accepted standard for the terms we use to describe processing and part problems. For example, what is the difference between a weld line, flow line, knit line, meld line, and … you get the picture. How can we get to the science when many of us are using different names for the same issue, and sometimes the same name for different issues?
My goal for today is to pick one term: Cushion. I’ll tell you what it means and why it’s important.
There are two definitions (see what I mean?) for cushion in molding: 1) the position of the screw when the hold or second-stage timer ends; 2) the most forward position the screw reaches during injection (first or second stage). Sometimes this is labeled “cushion minimum.”
While these definitions are not the same, the values they produce may or may not be, depending on the mold, machine, or process. Confused? To duplicate and document a process correctly, the molder needs to know the difference and understand what the machine is reporting.
Let’s use an example to explain. Suppose that during first-stage injection, the screw reaches 6 mm from the forward zero position—the transfer point from first to second stage. Thus, 6 mm is the stroke transfer position (velocity to pressure control, or V to P). And supposed that there is enough hold pressure so there is no bounceback of the screw and it continues forward to pack the part. At the end of the second stage (pack and hold), the screw is at 3 mm, which makes this both the position of the screw at the end of second stage and the screw’s most forward position. In this scenario both definitions of cushion would result in the same 3-mm value.
In another scenario, let’s say the screw reaches the 6-mm stroke transfer position during the first stage, yet bounces back slightly due to a required low hold pressure to minimize overpacking at the gate. (For some parts screw bounceback is acceptable as long as the flow front does not hesitate in filling the cavity. Plastic is compressible.) Here, the position of the screw at the end of hold is at 8.5 mm. Some machines will report a cushion of 6 mm, and the screw position at the end of hold as 8.5 mm. Another machine would simply report 8.5 mm as the cushion, and yet another might report cushion as 6 mm. My preference is to see both reported. This is not a case where one machine is better than another, just that there are two definitions being used and you need to know what the numbers mean. Which definition is right or best? That’s not my call. Better check out what your machines are reporting to you. Is your documentation correct?
WHAT’S ACCEPTABLE?
Now that the definitions are established, what should the cushion be and what is an acceptable range? My bet is that if we sampled 50 molders we would have lots of different responses. To start answering these questions, let’s state the purpose of a cushion: to provide a pressure pathway to enable packing out the part. To properly pack out a part, there has to be plastic in front of the screw/non-return valve (check ring) to provide a means to transmit plastic pressure through the nozzle, sprue, runner, and gate(s) to the part. There are processes such as gas assist that do not require the injection unit to pressurize (pack out) the cavity, but for our discussion, we will stay with conventional injection molding.
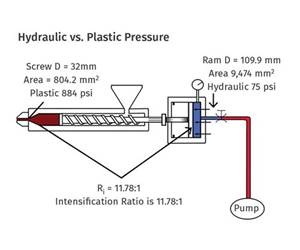
On a hydraulic machine you can program hold pressure: For example, if you set 850 psi (59 bar), you will get 850 psi hold pressure for the time you set on the second-stage or hold timer. However, if the screw reaches the zero position or “bottoms out” at any time during the hold stage, there is a good chance you’ll make a bad part. Without that “cushion” of material in front the screw, the hydraulic pressure is not developing any plastic pressure in the nozzle, and most likely the part won’t be properly packed.
On an electric machine, if the screw reaches the zero position, the results will be the same. However, the controller is often programed to reduce the hold pressure to some minimum value to avoid unnecessary load on the expensive electric servo motor. The controller knows the screw cannot move forward any further and subsequently reduces the forward pressure.
While I prefer units of volume for shot size and cutoff position, cushion is best stated as a distance. Picking a particular volume as a rule of thumb would be a very small distance on larger screw diameters. My target is about 6 mm, or 0.25 in. This assumes that the numbers on the controller screen are accurate.
If the position sensor is not calibrated correctly, you could be reading a 3-mm cushion on the controller when in fact the screw is at the bottom or end of the stroke. Safety tip: it is critical that the screw tip never touch the barrel end cap, because it has the power (pressure) to blow the end cap off. There is always a minimum clearance; my understanding it is about 1.5 mm (0.060 in.). The hydraulic cylinder has stops in it to prevent going beyond this, providing the screw is the correct length. (I am not sure how electric machines handle this.)
Finally, how much shot-to-shot variability is acceptable? In an ideal world the answer is zero. Unfortunately, variability is a fact of life due to check-ring design, wear factors, contamination, lack of maintenance, and the fact that most nonreturn valves have a propensity to leak differently from shot to shot.
If you would like to get an idea of how much they leak, do a simple test on any given part. Note the actual screw start position before injection and the cushion using definition number 1 above. You can now calculate the volume of the stroke using the equation for the volume of a cylinder:
Volume=π × r² × stroke length.
Now catch all the plastic parts and runners, etc. that drop out of the mold. Weigh them all. Find the melt density for the plastic you are using, and calculate the volume of molten plastic needed to make the parts you weighed. Let me know if the volume calculations match. I’ll bet that the calculated shot volume is 1.3 to 2 times the volume calculated from the plastic weight. Because of these issues with non-return valves, my cushion window is ±1.0 mm. (It should be less for a plunger.)
Related Content
How to Get Rid of Bubbles in Injection Molding
First find out if they are the result of trapped gas or a vacuum void. Then follow these steps to get rid of them.
Read MoreHow to Optimize Pack & Hold Times for Hot-Runner & Valve-Gated Molds
Applying a scientific method to what is typically a trial-and-error process. Part 2 of 2.
Read MoreUnderstanding the ‘Science’ of Color
And as with all sciences, there are fundamentals that must be considered to do color right. Here’s a helpful start.
Read MoreRead Next
Lead the Conversation, Change the Conversation
Coverage of single-use plastics can be both misleading and demoralizing. Here are 10 tips for changing the perception of the plastics industry at your company and in your community.
Read MorePeople 4.0 – How to Get Buy-In from Your Staff for Industry 4.0 Systems
Implementing a production monitoring system as the foundation of a ‘smart factory’ is about integrating people with new technology as much as it is about integrating machines and computers. Here are tips from a company that has gone through the process.
Read MoreAdvanced Recycling: Beyond Pyrolysis
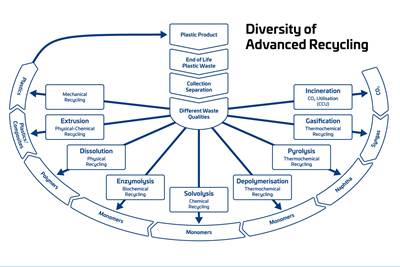
Consumer-product brand owners increasingly see advanced chemical recycling as a necessary complement to mechanical recycling if they are to meet ambitious goals for a circular economy in the next decade. Dozens of technology providers are developing new technologies to overcome the limitations of existing pyrolysis methods and to commercialize various alternative approaches to chemical recycling of plastics.
Read More
.jpg;width=70;height=70;mode=crop)







.png;maxWidth=300;quality=90)


