
Monday Morning Start-Up Of Accumulator Head Machines
Blow Molding Know How
A good way to achieve plantwide consistency on restarts is to establish a blow molding checklist based on the items discussed here, as different operators may be performing these steps at various times.
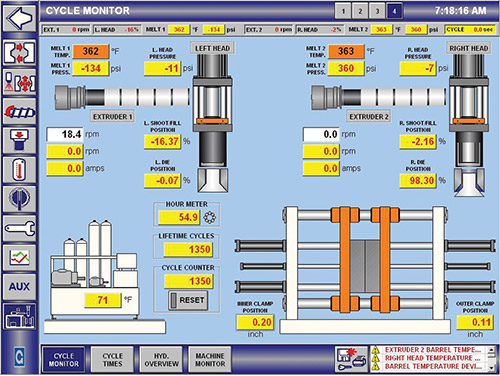
Cycle monitor provides an overview of all major machine functions, giving the operator the status of all conditions on one screen page.
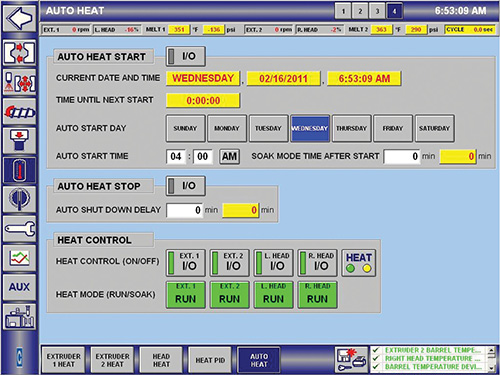
Automatic heat-up screen is used for timed heat control during start-up.


One of the most critical times for a production operation is the restart after a shutdown of a few hours or an entire weekend. Different molders proceed through these restarts in different ways. With today’s controls technology, many of the tasks are monitored on-screen, and “help” tips are available to resolve issues that may be presented to the operator.
That said, a good way to achieve plantwide consistency on restarts is to establish a blow molding checklist based on the items discussed here, as different operators may be performing these steps at various times. For the purposes of this column, we are assuming a restart on a currently running product with the same material and color.
If the machine has automatic heat-up, the first step is to assure that the heaters are in fact on and progressing to a fully ready “soaked” state. Soak time is defined as the heating process to ensure that the running temperature has “soaked” through the entire unit, including the outside of the heated component, the plastic inside, and internal metal parts.
The heat-up process should be monitored every few minutes to avoid a lag in heat soak. Pay special attention to the head(s), as these are large and require the most heat-up and soak time. Typical heat/soak timing for an accumulator head is about 4 hr.
Make sure critical utilities such as plant cooling water and air supplies are energized at this point. This will allow significant time to bring the conditions up to normal running state.
Another priority is to check for any machine alarm conditions. Active alarm issues can be resolved at this time. This will minimize headaches as you progress with your start-up.
At this juncture, walk around the machine to assess its condition and any possible issues. This will prevent delays from popping up once the machine is started. This inspection may include, but is not limited to, looking for any oil or water leaks, loose components, plastic buildup on tooling or heads, resin spills, metal on hopper magnets, filter clogging on control cabinets or drives, and exhaust muffler fouling.
Also examine auxiliary equipment such as blenders, vacuum loaders, chillers, heat exchangers, and the like for similar issues. This should take just a few minutes. In warm, humid conditions, this inspection may have to be delayed or settings modified to avoid a buildup of condensation on the molds prior to processing.
A general area housekeeping review and touch-up is also recommended to keep the work area safe and more efficient during the machine start-up.
Preparing any work-in-process documentation is best done before machine start-up. Once the machine has been checked out as suggested, the next step is a purging sequence to get material moving, clear out any degraded material, and start to move toward a steady-state machine condition.
Again, first verify that the heaters are at setpoint and fully soaked. Then bring all gates and safety interlocks to the safe condition. Start the hydraulics and the parison-program hydraulics if necessary on your particular machine. Bring all of the machine axes to their “home” position. Check auxiliary functions such as retractable blow, needle-blow action, core pulls, and blow stands.
Then open the hopper slide to start material flowing into the extruder. Reduce the extruder screw speed to a low setting (typically about 5-7 rpm). It’s extremely important to watch the drive amperage and extruder end pressures during this period to avoid equipment damage from overpressure conditions. Bring screw speed gradually up to desired rpm, watching the amps and pressure.
Partially fill and purge the head(s) to expel any degraded material and start the process of temperature normalization. Once the head purging shows no degraded material and good parison formation, the machine is ready to begin processing. A final head tooling cleanup at this time is the last step to prepare for production start-up.
Fill the head(s) and start the machine in semi-auto or full automatic operation. During this time, changes to machine settings or mechanical adjustments should be held to a minimum, as the extruder and head(s) require some time to settle into a steady state. Although it may be hard to resist making adjustments now, the benefits of waiting are a more efficient overall start-up plan.
Minor adjustments may be necessary to maintain a fully automatic cycle, which is a step toward reaching the process steady state necessary for consistent production. After reaching the steady state on the machine, the quality and product checks will signify when the product is ready to pack. This could require some minor fine-tuning adjustments.
EDITOR’S NOTE: The author acknowledges Steve Griffiths’ contribution to this article. Griffiths has 17 years of hands-on experience with industrial accumulator head machines. He is currently senior process/service technician for Graham Engineering Corp. He has been involved with hundreds of machine startups and troubleshooting over the years. Contact: (717) 891-3852; email: sgriffiths@grahamengineering.com


Related Content

Blow Molder Packs Sustainability Into Every Container
With back-to-back EcoVadis platinum recognitions, Ring Container Technologies is a sustainability frontrunner. PT toured the company’s Fontana, California, blow molding facility to see what it takes to be an eco-conscious producer of plastics packaging.
Read More
Is There a Better Way to Heat PET Preforms for Stretch-Blow Molding?
Is near-infrared (NIR) heating better, faster and more energy efficient? So far, only two machine builders are making such claims for NIR in place of standard mid-infrared preform heating, though their systems appear to be well accepted. Meanwhile, an altogether different alternative is in the works.
Read More
Plastics Technology Year in Review: Your Favorite Reads of 2024
A year-end review of the top stories showcasing industry trends, advancements and expert insights. Revisit the articles that captured the attention of the plastics community.
Read More
Recyclability of PET/PEF Multilayer Barrier Bottles Gets Further Validation
Europe’s RecyClass considers PET/PEF multilayer bottles to be fully recyclable in the PET stream.
Read MoreRead Next

People 4.0 – How to Get Buy-In from Your Staff for Industry 4.0 Systems
Implementing a production monitoring system as the foundation of a ‘smart factory’ is about integrating people with new technology as much as it is about integrating machines and computers. Here are tips from a company that has gone through the process.
Read More
Beyond Prototypes: 8 Ways the Plastics Industry Is Using 3D Printing
Plastics processors are finding applications for 3D printing around the plant and across the supply chain. Here are 8 examples to look for at NPE2024.
Read More
