Tooling: Tunnel Gates for Processors, Part 2
What you need to know to overcome problems out on the production floor.

If an ejector pin is too far away from a tunnel gate, adding stiffening ribs to the runner will reduce its flexibility.

Determining the location of the ejector pin that forms a boss for a tunnel-gated mold that will run multiple materials is especially challenging.
Converting elliptical gates to chisel gates often solves a flaking problem.

An ugly tunnel-gate scar is often caused by more than just one problem.
If an ejector pin is too close to a tunnel gate, increasing the length of the boss and increasing the mass of plastic at the parting line often fixes the problem.


Tunnel gates can be temperamental. Sometimes they work flawlessly. Other times they’re a real challenge. In the last column, I addressed issues from the point of view of the mold designer. Here, I’ll cover the more common problems with tunnel gates from the processing perspective, and offer some proven solutions to those problems.
Four very common problems associated with tunnel gates that you may run into are:


- They don’t want to come out of their bore;
- They break off;
- They shoot across the mold upon ejection;
- One gate comes out, but another stays put.
If the tunnel gate is machined into the stationary side of the mold and it doesn’t want to come out, open the mold about 1/4 in. and check to see if the runner is being pulled out of the moving side of the mold. If so, you need to retain the runner better.
Increasing the length of the boss near the tunnel gate, or increasing the amount of undercut formed on that boss, will usually solve the problem. But don’t rule out a worn gate or an unpolished bore as contributing factors.
The more common scenario of why a gate doesn't want to come out is because it broke off where the gate meets the runner, or where the runner meets a boss formed by a shortened ejector pin. This is very common with rigid and filled materials. The culprit is almost always a sharp inside edge at their intersections.
The solution is to radius the heck out of these areas. It may not look pretty, but it works. In addition to reducing the notch sensitivity in these locations, you’ll also increase the mass of plastic. This extra mass stays hotter longer, and allows the material to be more ductile. If there is room available, you can also increase the included angle of the tunnel gate to further increase the mass of plastic at the parting line.
Increasing the mold temperature on the side of the mold that the tunnel gate is machined into often works, but at the expense of having to extend the cycle time. Some people increase the size of the runner in and around the gate location to increase its flexibility.
I don’t recommend doing that on multi-cavity molds because it can affect the cavity balance. Before you try any of these suggestions, make several shots at a faster cycle time. The faster the cycle, the hotter the mold, and the hotter and more flexible the gate and runner become. If you’re still making good parts at a faster cycle and the gate sticking and breaking issues went away—you’re a hero.
Have you ever gotten grease on your parts because the runner bounces off the leader pins or tiebars before it goes down the chute? That often happens when the tunnel gate is machined in the moving side of the mold and the boss next to the gate is too short. The tunnel gate is basically a pre-loaded spring up until the point where it clears its bore. If the boss disengages from the mold before the tunnel gate disengages, the runner becomes a projectile. Extending the length of the boss formed by the ejector pin will usually solve the problem.
For multi-cavity molds, or parts with multiple tunnel gates, it’s not uncommon for one gate to come out, while another gate stays put. Usually this happens because one of the ejector pins slides past the runner during the ejection stroke. Again, extending the length of the bosses formed by the ejector pins will usually solve the problem.
For tunnel gates machined into the moving side of the mold, the length of the boss formed by a shortened ejector pin should always be greater than the length of the tunnel gate—not its depth, but its hypotenuse. If you don’t have the bearing surface in the mold to shorten the ejector pin by the required amount, or if there isn’t enough ejector stroke available (either from the mold or the machine), try putting a point on the tip of the ejector pins. Some people call this a “centering cone.”
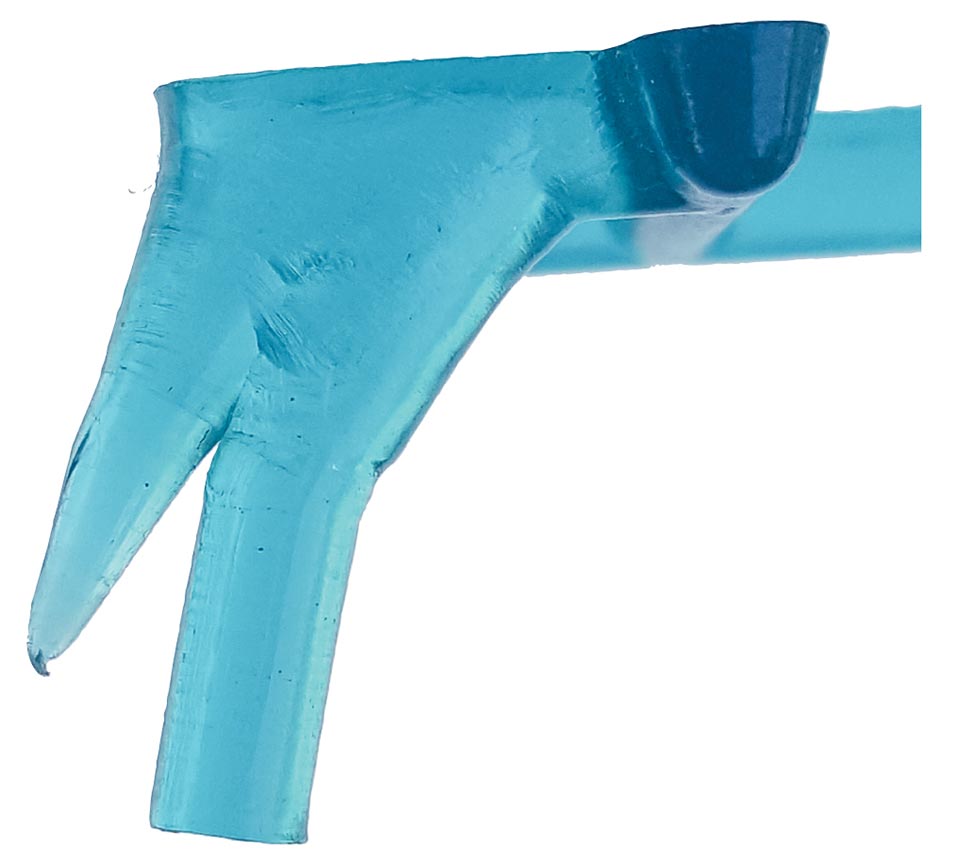
If you are fighting a flaking issue, one of the best solutions is to convert the elliptical gate to a chisel gate.
The goal is to keep the boss engaged with the pin, even when the pin is beyond the parting line of the mold. When a tunnel gate is machined into the stationary side of the mold, the initial mold opening speed can influence the ability to remove the tunnel gate from its bore, and it can affect the condition of the vestige on the part. Conversely, when the tunnel gate is machined into the moving side of the mold, the initial ejection speed can influence the ability to remove the tunnel gate from its bore, and it can affect the condition of the vestige on the part. Since varying these speeds can give you different results, even if you don’t see a problem, it’s good practice to find out which works better—fast or slow. Then adjust your set points accordingly to help widen your processing window.
If you have a problem with jetting, it’s probably because the material isn’t hitting an obstruction or impinging on some type of molding feature right away. If the material is shooting into a large void, jetting can be difficult to overcome.
And if the gate is undersized, that makes the matter even worse. Increasing the gate size is the first thing you might try, because it is usually the least expensive option. Raising the temperature of the core might help, because sometimes the melt bounces off a cold core and squirrels its way farther down the cavity.
Know How Tooling: Get More Insights From Our Expert Authors
You can also profile your injection velocity—going very slowly from right before the gate until it makes a small molten puddle just beyond the gate. The puddle acts as an obstruction to the material behind it. Once the puddle is formed, you should be able to go back to the desired injection velocity. The downside to this “solution” is that you are now processing around a tooling problem. If you want to fix the root cause, ask if a small core pin directly opposite a gate can be added, specifically to create an obstruction to stop the jetting. The core pin does not need to extend all the way to the cavity, which would form a through hole. It can be left short—with a height approximately equal to the depth of the gate.
The mold designer will select the type of tunnel gate, where to put it, what size it should be, and what method to use to remove it. This is all derived from what he has been taught and learned over the years. But no two molds are alike. What worked 100 times before may not work the 101st time. When something goes wrong, the designer and the tool shop would benefit from your input on how to resolve the problem. But first, you must define or describe the problem to them. Nothing does that better than a video taken with your cell phone, played back in slow motion.
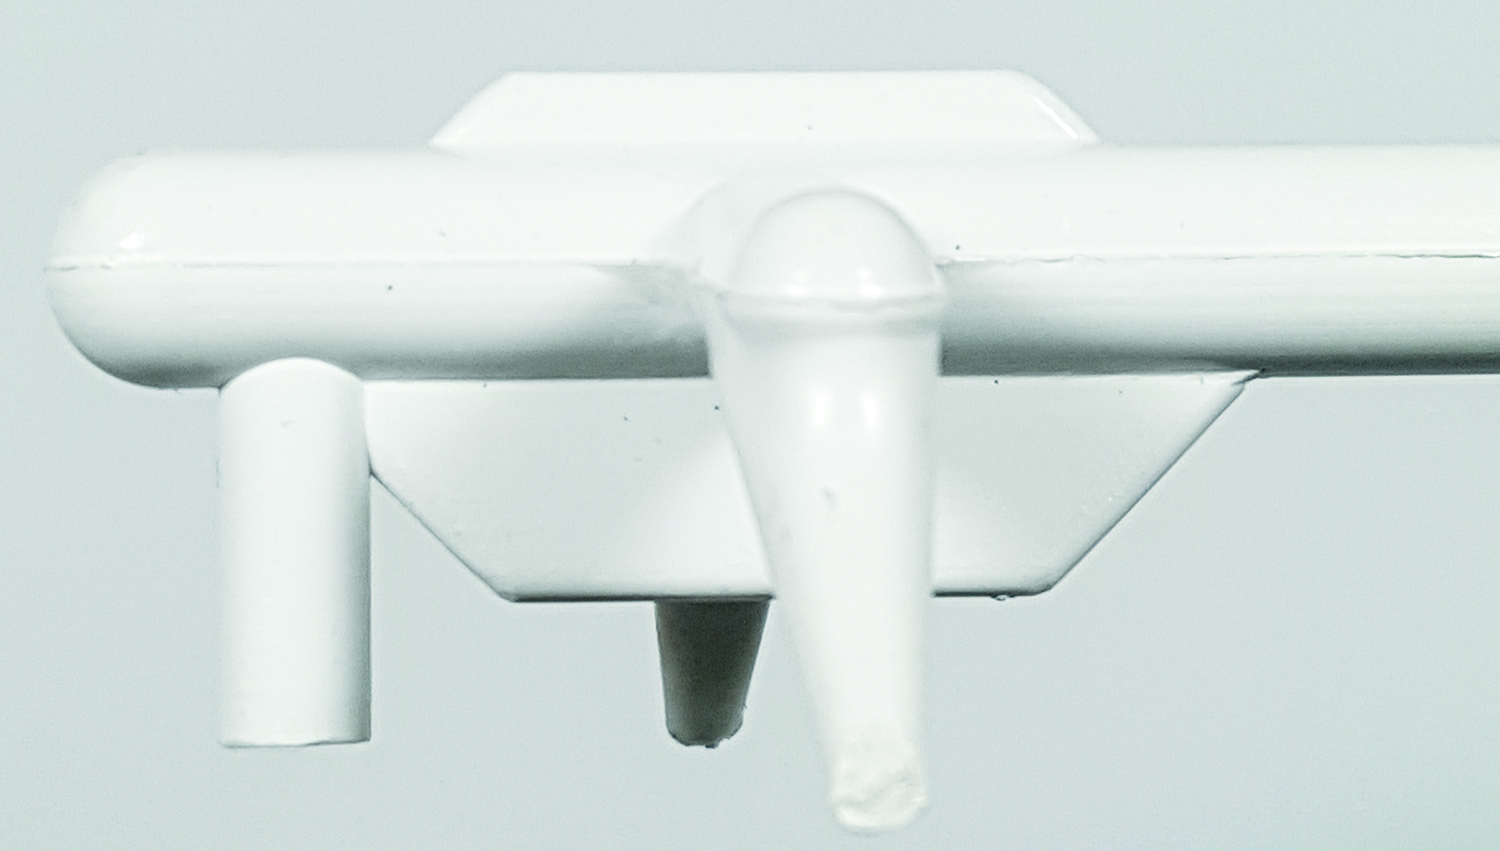
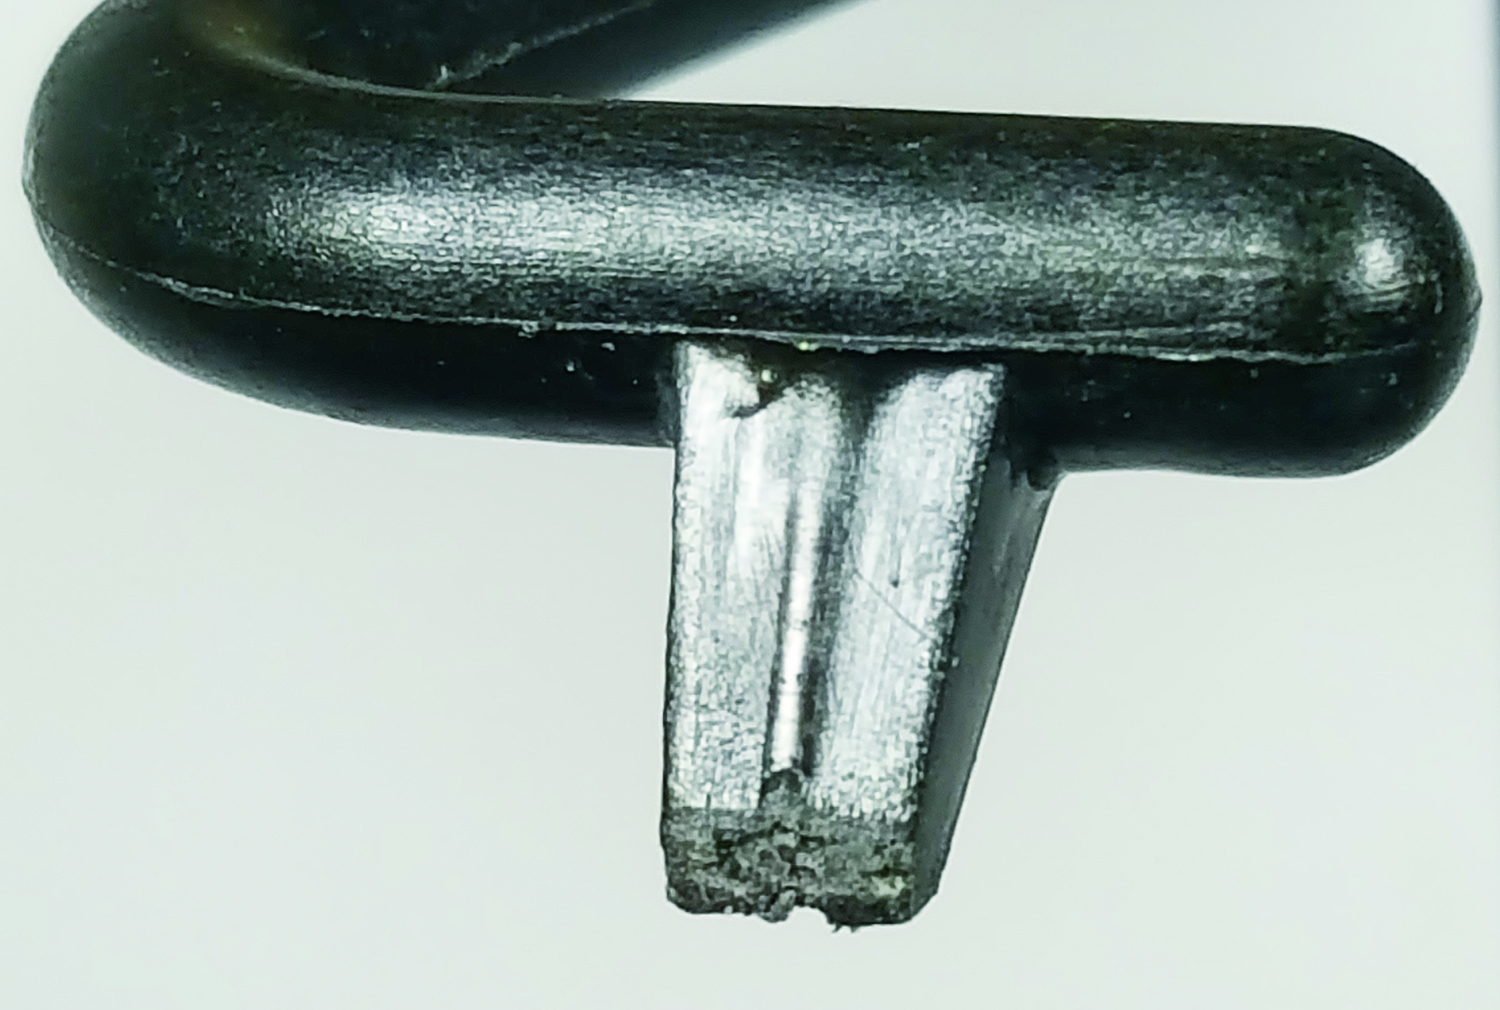
The photo at right shows an ugly gate scar from an elliptical tunnel gate machined into the stationary side of a two-plate mold. Notice how the gate scar is rough and somewhat indented. There are also some drag marks on the side of the part below the gate. One of the obvious reasons this happened is because the cutting edge of the gate is worn. A second, not-so-obvious reason is that the tunnel-gate bore is rough or pitted. A third, not-so-obvious reason is because the gate is rather large, and the runner may be flexing during mold opening.
Large gates have a significant amount of holding force on a part. It’s often enough force to pull a flexible runner out of the moving side of the mold during the mold-opening stroke. Once the holding force of the bent runner overcomes the holding force of the gate, it pulls or rips the gate off the part. Since the inner wall thickness of the part is usually warmer than the frozen gate, it breaks off at the warmer or weaker portion—leaving an indentation in the part. The solution to this combination of problems is to sharpen the gate, draw polish the bore, and increase the rigidity or holding force of the runner.
The most common cause of a runner being too flexible is because the shortened ejector pin that forms the boss is too far away from the gate. If the pin cannot be relocated closer to the gate, due to a water line or some other obstruction, ribs can be added to stiffen the runner and reduce the flexing. Stiffening ribs can be added to either side of the parting line, or in severe cases, both sides.
Deciding where to locate the shortened ejector pin so that the runner isn’t too stiff or too flexible is no easy task. And if the mold has to run more than one type of material, it makes the decision that much harder. One option is to add a second—interchangeable—shortened ejector pin, closer to or farther away from the gate than the existing pin. This gives you the ability to use one pin for one material, and a second pin for a second material.
Got flakes? Last month I touched on how flakes are formed at the tip of any type of tunnel gate, with elliptical tunnel gates being the worst offender. If you are fighting a flaking issue, one of the best solutions is to convert the elliptical gate to a chisel gate. The tunnel gate pictured on p. 52 is one I modified for a part made of 45% glass-filled nylon 66. You can still see where the elliptical gate used to be. The flaking stopped immediately, and the processing window widened.
ABOUT THE AUTHOR: Jim Fattori is a third-generation injection molder with more than 40 years of molding experience. He is the founder of Injection Mold Consulting LLC, and is also a project engineer for a large, multi-plant molder in New Jersey. Contact jim@injectionmoldconsulting.com; injectionmoldconsulting.com.
Related Content

The Importance of Melt & Mold Temperature
Molders should realize how significantly process conditions can influence the final properties of the part.
Read More
A Simpler Way to Calculate Shot Size vs. Barrel Capacity
Let’s take another look at this seemingly dull but oh-so-crucial topic.
Read More
Hot Runners: A View from the Bottom Up
Addressing hot-runner benefits, improvements, and everyday issues from the perspective of decades of experience with probably every brand on the market. Part 1 of 2.
Read More
Formulating LLDPE/LDPE Blends For Abuse–Resistant Blown Film
A new study shows how the type and amount of LDPE in blends with LLDPE affect the processing and strength/toughness properties of blown film. Data are shown for both LDPE-rich and LLDPE-rich blends.
Read MoreRead Next
Tunnel Gates for Mold Designers, Part 1
Of all the gate types, tunnel gates are the most misunderstood. Here’s what you need to know to choose the best design for your application.
Read More
Understanding Melting in Single-Screw Extruders
You can better visualize the melting process by “flipping” the observation point so that the barrel appears to be turning clockwise around a stationary screw.
Read More
Troubleshooting Screw and Barrel Wear in Extrusion
Extruder screws and barrels will wear over time. If you are seeing a reduction in specific rate and higher discharge temperatures, wear is the likely culprit.
Read More