Eliminate Blemishes on Cosmetic Parts
Black specks, streaks, or poor color mixing are the most common problems that mar the appearance of cosmetic injection molded parts.
Black specks, streaks, or poor color mixing are the most common problems that mar the appearance of cosmetic injection molded parts. Three likely culprits are resin degradation, equipment contamination, and processing errors.
Specks can be due to contamination of the polymer or to resin degrading in a dead spot in the screw flights and being carried through with the next shot. Streaks derive from contamination on the screw, such as degraded material in a dead spot, or from the wrong screw design. Poor color mixing can be due to the screw design or incompatibility between the substrate and the colorant.
Mind your material
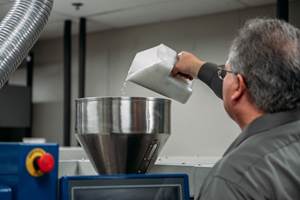
When starting a new resin or restocking an existing material, sample the bag, gaylord, or hopper at different depths with a sampling wand. Take 2 lb out for inspection. Load the pellets on a white plastic tray over a strong light source. If you can see black specks embedded in the pellets, then contact the resin supplier. If you find specks on the surface of the pellets, then inspect your material-handling supply lines. If there are excessive fines, filter them out with a fines separator. Fines degrade easily and cause specks.
Next, check the colorant. Is the carrier compatible with the base resin? There is no such thing as a “universal carrier” for a colorant. If the carrier is not compatible with the substrate resin, both color quality and physical properties may be compromised.
Check that the resin is being dried as the supplier recommends. Drying too hot degrades the resin and can cause black specks or a color change.
Don’t leave a machine filled with resin running idle for any significant period of time. Long residence times are an invitation to material degradation and are the cause of most black specks. That also means your shot size should be at least 25% of the barrel capacity.
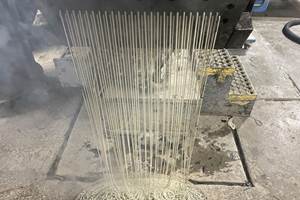
If the simple pellet check does not turn up the source of black specks, the next step is to check a purge shot. That shot must contain material that was plasticated with appropriate backpressure and melt temperature. About 1000 psi of backpressure (plastic pressure, not hydraulic pressure) is critical to completely fill the screw channel and minimize the chance of material being left behind in a dead space on the screw. On the other hand, less than 1000 psi backpressure is suitable if you are using a resin sensitive to degradation.
Look for specks in the “purge patty.” If raising the backpressure increased the number of black specks, that’s a good indication that the screw design is to blame.
If the purging is clean but you still get specks when you mold parts, then look farther downstream. If the barrel and screw are not the source, then degradation may be occurring in the hot runner. Hot-runner temperatures are notorious for being out of wack.
Evaluate your equipment
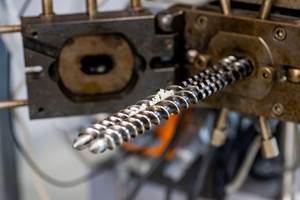
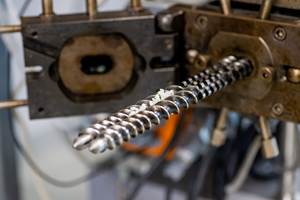
General-purpose screws and dispersive-mixing designs are prime sources of black specks, streaks, and color mixing problems. This can be especially true when molding clear materials like acrylic, polycarbonate, and SAN or sensitive materials like PVC and acetal. G-P screws may not be wise choices for clear materials because they tend to have dead spots behind the flights in the metering and transition sections where polymer can hang up and degrade. Rounding the back side (non-pushing side) of the flights can eliminate the dead space.
For molding clear resins, it is important to have a screw made of more corrosion-resistant material than is common on original equipment. G-P screws are often made from lower steel grades that can accelerate resin degradation. The screw should also be highly polished, with no sanding lines.
Cleaning the screw and barrel will help reveal the source of a part-appearance problem. Run a medium-flow polypropylene as the last material before pulling the screw. Check for carbon buildup behind the flights in the metering and transition sections. Do not be surprised to see a color that was molded days or weeks ago on the back side of these flights.
Your screw should have a mechanism to prevent unmelted solids from getting through to the mold. But a barrier screw or high-intensity mixing device can also cause trouble. Barrier screws can yield severe resin degradation and black specks due to the huge dead spots in their design. The solution may be a modified barrier design that is not a continuous barrier flight but tapers into a metering flight.
Mixing screws also can be a major source of part blemishes. Look for one designed for distributive, not dispersive, mixing. Dispersive mixing produces high shear that breaks up agglomerates into finer particles. Distributive mixing blends more gently. Use a screw with at least 20:1 L/D to attain good distributive mixing. If your screw has an L/D of 16:1, you are asking for problems.
You can check your screw’s mixing capability by adding just a few color granules at the feed throat. Count how many shots it takes before the color shows up in parts—that will give you an idea of the residence time. When the color does appear, if it comes out as a uniform pastel shade, you have good mixing. If it comes out as streaks, you need a better screw design—providing you have adequate backpressure and a compatible color carrier.
An interesting discovery is that worn barrels and screws can sometimes provide better mixing than new equipment. With worn barrels and screws, you get some backflow over the flights, which provides better mixing and even moves material out of dead spots.
The front of the screw has several components needing close inspection. Check the non-return valve, nozzle end cap, and nozzle tip for abrupt changes in flow path—more dead spots where polymer can hang up and degrade. Of course, if you spot broken or chipped flights or nicks in the nonreturn valve or screw tips, these are likely sources of black streaks and must be replaced.
The nozzle body and screw tip are notorious for causing degradation. Keep the nozzle body as short as possible with a free-flow (cone) design. Temperature should be PID controlled—not with variac or percentage methods! Also make sure the thermocouple is placed close enough to the nozzle tip to provide effective temperature control.
Barrel temperature control is also important. Look for hot spots or zones overriding setpoints, where the heater bands are constantly on or constantly off. If a barrel zone is constantly on, raise the temperature of the barrel zone preceding it. Raising the temperature puts more heat into the resin just before the following zone. If a barrel zone is constantly off, again raise the temperature of the zone before it but also reduce backpressure and screw rpm. Raising the temperature of the zone preceding it will reduce viscosity and thus lower the amount of shear heat being put into the resin. Lowering the backpressure and the screw rpm also will put less shear heat into the resin. This means less temperature override, which is probably causing the downstream hot spot that keeps the heater zone constantly off. Meanwhile, check the actual melt temperature using a hot probe or an infrared sensor.
Vented barrels should be avoided, as the screw and vent area are often prone to dead spots. Run screw recovery for as long as you can during cooling, as slower rpm provides better mixing and minimizes hot spots.
After the resin, screw, and barrel are checked, move on to the hot-runner system if you have one. Many hot runners have dead spots formed by gun-drilled channels at right angles. Also check for burned-out heaters and open or incorrectly placed thermocouples.
John Bozzelli has taught seminars on plastics design and processing for more than 15 years. He has extensive experience in polymer development and processing from more than 20 years with Dow Plastics. He is the founder of Injection Molding Solutions in Midland, Mich., a provider of in-plant training and consulting services to injection molders. Tel: (998) 832-2424 or e-mail: john@scientificmolding.com
Related Content
Market Changes Spur Industrial Recycler to Enhance Capabilities in Clear Plastic Reprocessing
Butler MacDonald found new business and flexibility thanks to a big step-up in purging efficiency.
Read MoreRun Lots of Colors? Time to Consider a Commercial Purging Compound
Processors who use commercial purging compounds will see a reduction in scrap levels, machine downtime and overall cost.
Read MoreThe Power of Self-Emptying Technology for Extrusion Lines
Advanced purging compounds can save you time, frustration, and cost.
Read MoreUse Purging Compounds to Mitigate Processing Challenges of PCR and PIR
With frequent purging, you can minimize serious contamination issues and get both better results and higher profits.
Read MoreRead Next
Understanding Melting in Single-Screw Extruders
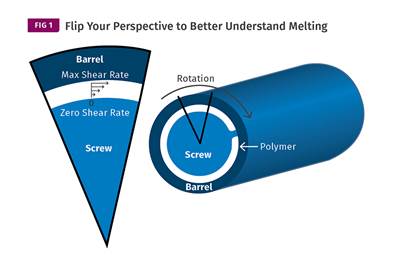
You can better visualize the melting process by “flipping” the observation point so that the barrel appears to be turning clockwise around a stationary screw.
Read MoreHow Polymer Melts in Single-Screw Extruders
Understanding how polymer melts in a single-screw extruder could help you optimize your screw design to eliminate defect-causing solid polymer fragments.
Read MoreLead the Conversation, Change the Conversation
Coverage of single-use plastics can be both misleading and demoralizing. Here are 10 tips for changing the perception of the plastics industry at your company and in your community.
Read More
.jpg;width=70;height=70;mode=crop)








.png;maxWidth=300;quality=90)
