


Putting a sensor anywhere in a tool can give you some form of data, but it may not be value added. The key is knowing upfront what you want the sensor to do for you before determining where to place it, and what type of sensor you want to use. Start by answering these five questions in chronological order.
There are a variety of sensor types and configurations to choose from, as well as different ways and different locations in which to mount them. What you want to accomplish helps determine your choices.
1. What Do You Want the Sensor to Do for You?
This is the most important question to ask before installing sensors in your mold. Most people stall right here because they’re not sure what functions a sensor can actually perform. A lot of people just want to instrument a tool because they’ve heard they should run Decoupled Molding processes or they want to try out process-control software. Others are curious about the ability to collect data, track a part to a molding cycle, resolve existing production challenges, or create a template to maintain or transfer processes. Whatever the answer, this single question needs one before proceeding so you can make decisions to work toward your goal moving forward.


Maybe you think you need a mold sensor, but are not sure why or for what purpose.
Once that question has been answered, we can begin to explore the many different functions sensors can serve if used correctly. Some examples are monitoring pressure at a specific area in the cavity, transferring the injection portion of the cycle to hold via pressure, detecting mold deflection, sequencing valve gates, automatically sorting bad parts, and the list goes on. Once you know what you want the sensor to achieve, you have some important decisions to make.
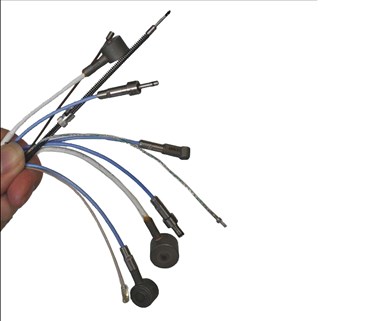
Where and how to mount mold sensors depends on a number of factors, including mold design and press capabilities.
2. Where Do You Want to Install the Sensor?
Conventional installation locations to consider include post-gate, mid-cavity, and end of fill, but there are a few other locations in addition to these. You may need one or a combination of these locations, depending on your particular project. In some cases, it’s not necessary to instrument every cavity.
It’s also important to note how hot the steel is where the sensors will be mounted. The electronics in the connectors of some sensor models are only rated to 140 F, although other electronics are rated higher, and there are techniques available to mount the electronics away from the heat on hot molds.
Post-gate sensors allow you to know the moment plastic enters the cavity and at what pressure. With this information, you can perform various studies, including pressure loss (from nozzle to gate), pack rate, and gate seal (pressure lost when the hold pressure is released). In addition, post-gate sensors are often the location of choice when using a “Decoupled III” process to transfer from pack to hold using cavity pressure; but other locations can work as well, depending on your machine and percentage of barrel usage for the shot.
Mid-cavity sensors also can aid in performing calculations like determining pressure loss through the cavity and cavity deflection. In addition, they can help with timing the firing pattern of hot-runner valve gates on larger parts, like car panels, especially when located near each gate. In such applications, sensors can help with moving or eliminating knit lines or reducing the flow-length/thickness ratio.
Mid-cavity sensors are also a good option for very small parts, as they can typically represent an average pressure in the cavity and may be the only location available if moving ejector pins are not located at the last point to fill.
End-of-fill sensors are the most common location used for automatically sorting bad parts, like short shots, based on cavity pressure. They can also monitor the pressure required to fill your part when used in conjunction with a post-gate sensor. By subtracting the end-of-fill pressure from the post-gate pressure, you can see the pressure loss through the cavity and observe the cooling behavior of the plastic, which is critical in semi-crystalline polymers.
In addition to pressure sensors, in-cavity temperature sensors also have roles to play.
In addition. cavity-temperature sensors can be used to detect the time at which the flow front passes over a particular area in the cavity, because the temperature rises rapidly as plastic flows over them. Like mid-cavity sensors, this can be useful in timing the opening of sequential valve gates when the sensors are located close to each gate. Cavity-temperature sensors can also measure the surface temperature of the steel, which affects part dimensions for semi-crystalline parts. They can even measure the relative melt temperature of the plastic that is passing over the sensor.
3. How Should You Install the Sensor?
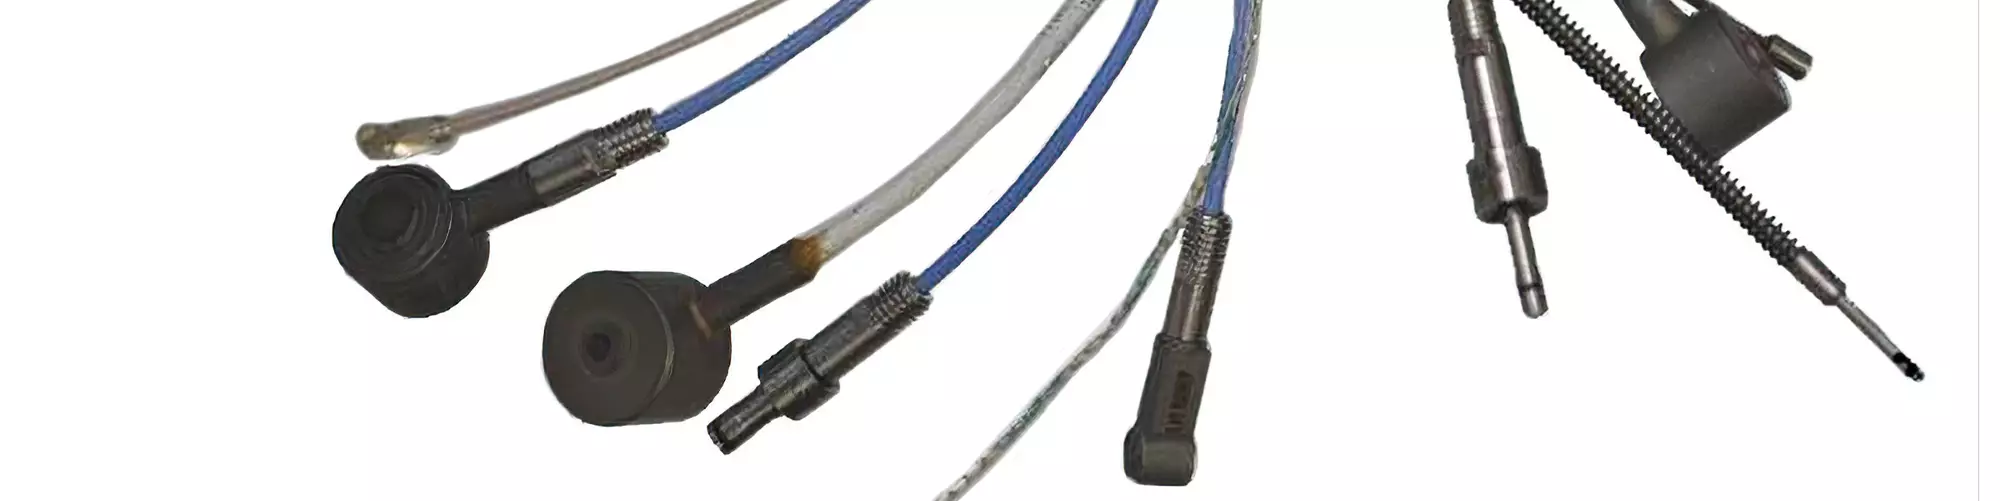
The most common installation styles for pressure sensors are flush-mount and button styles. Flush-mount sensors are mounted in the cavity block so the sensing surface is in contact with the plastic. Button-style sensors are mounted away from the cavity, and the pressure is transferred to the sensor via ejector pin, transfer pin, static pin or ejector sleeve. The choice of sensor style depends on many factors, including the availability of ejector pins in the desired cavity location, the space available for the sensor, and the temperature of the mold.
Based on decades of sensor installs, customer feedback, and testing, we strongly believe that mounting the sensor in the clamping plate and utilizing a transfer pin to transfer the pressure is the most robust configuration for most applications. These are some of the benefits:
·• Mitigating the chances of damaging the sensor due to the tool’s action or while it is serviced on the bench;
·• Ease of access;
·• Minimizing heat exposure to the sensor;
·• Improving the sensor’s life by removing it from the motion and shock of the ejector plate.
4. What Type of Sensor Technology Do You Need?
The two major types of pressure-sensor technologies are strain-gauge and piezoelectric (both of which we offer). Strain-gauge sensors generally are more cost effective, require less maintenance, have more rugged cables, and are less susceptible to signal errors if water or other contaminants enter the connectors. Piezoelectric sensors are generally used in flush-mount applications and in certain applications where ultra-miniature sensors are required.
5. What Load Capacity Do You Need?
For button-style sensors, you need to determine the load capacity required of the sensor. The load capacity is determined by the predicted force that will be exerted on the sensor. To do this, you need two pieces of information: the projected area of the sensing pin; and the pressure you expect the plastic to see at the sensing location. Multiplying pressure × area gives you the expected force. The sensor you choose must have a load capacity higher than the expected force but not so high that the sensor signal gets “lost down in the mud.”
There are several ways to determine the expected pressure. The preferred method is to use flow simulation with predictions of the pressure in your chosen sensor area. If this is not available, you can resort to the material datasheet, which often gives a pressure or tonnage factor. This gives you the recommended pressure per square inch required within the cavity to mold that particular resin properly.
If the tool under consideration for instrumentation is already built and simulation is not an available option, you can perform a short-shot study to determine the pressure required during filling. To do this, you fill the part gradually at your preferred linear speed or volumetric flow rate and observe the filling pattern. Determining post-gate pressure is fairly straightforward, but determining mid-cavity and end-of-fill pressures can be a little trickier, depending on the material, flow rate, and geometry. The key is to not make too many assumptions without supporting your decisions with actual data.
About the Author: Brad Harvey has been in the plastics industry since 2006. He has worked in toolrooms at various medical injection molding companies, servicing production tools, managing spare tooling, and participating in design review of new molds. Harvey joined RJG in 2016; as engineering lab technician, he is able to utilize his experience in tooling, processing, and training. Contact: brad.harvey@rjginc.com; rjginc.com.


Related Content

How to Optimize Pack & Hold Times for Hot-Runner & Valve-Gated Molds
Applying a scientific method to what is typically a trial-and-error process. Part 2 of 2.
Read More
How to Reduce Sinks in Injection Molding
Modifications to the common core pin can be a simple solution, but don’t expect all resins to behave the same. Gas assist is also worth a try.
Read More
Improve The Cooling Performance Of Your Molds
Need to figure out your mold-cooling energy requirements for the various polymers you run? What about sizing cooling circuits so they provide adequate cooling capacity? Learn the tricks of the trade here.
Read More
Are Your Sprue or Parts Sticking? Here Are Some Solutions
When a sprue or part sticks, the result of trying to unstick it is often more scratches or undercuts, making the problem worse and the fix more costly. Here’s how to set up a proper procedure for this sticky wicket.
Read MoreRead Next
Why (and What) You Need to Dry
Other than polyolefins, almost every other polymer exhibits some level of polarity and therefore can absorb a certain amount of moisture from the atmosphere. Here’s a look at some of these materials, and what needs to be done to dry them.
Read More
How Polymer Melts in Single-Screw Extruders
Understanding how polymer melts in a single-screw extruder could help you optimize your screw design to eliminate defect-causing solid polymer fragments.
Read More
Understanding Melting in Single-Screw Extruders
You can better visualize the melting process by “flipping” the observation point so that the barrel appears to be turning clockwise around a stationary screw.
Read More